Updated 5/23/99
Things the RAY DREAM Manual Doesn't Tell You
SMOOTH CAMERA MOVEMENT IN RDS

INTRODUCTION
All credit for the technique discussed here belongs to Chuck Fox--aka "webfox"--a talented professional graphic artist and one of the past masters of Ray Dream (meaning he's moved on to Lightwave).
I was having problems creating a flight scene for the B17G (okay, so...it's the only thing I've ever done). I wanted the camera to zoom in on the aircraft's 12 o'clock (on the nose) and then smoothly orbit to its 6 o'clock (tail). Constantly adjusting the camera position and zoom factors made for a very crude and choppy movie. It's common to experience frustration when using the Navigation Panel in the Camera Properties window to position a camera.
This page discusses how to create a dolly device so that the motion of the camera will be constrained in a smooth circular arc around a central object. This is a technique well-known to experienced users, but would never have occurred to me without Chuck's guidance.
There are other techniques which can be used to achieve this effect, of course. One very common method is to move the hot point of the camera to the center of the object being orbited, and apply a Spin behavior. The method explained below offers some advantages, including a reliable visual indication of camera orientation relative to the object. This makes positioning in several axes far simpler. It also lets you precisely time the duration of the motions through the use of key event markers.
This tutorial will also demonstrate the use of multiple perspective windows. You will find this feature invaluable when creating animations. It allows simultaneously moving the camera and observing the effect on framing.
We're going to create a quick animation to demonstrate the convenience this technique provides. A full discussion of creating animations in RDS is beyond the scope of this write-up. Consult the manual for details wherever needed.
PROCEDURE
- Set up a standard animation workspace, typically with the timeline across the bottom of the window. Make the time axis about 15 seconds long.
- Place an object, any object of your own or off the Ray Dream CD, in the scene.
- Switch to a Top view in your scene, with the object of interest centered in the frame.
- Click on the Create Camera button, and drag the cursor to the general area where you want the camera to begin its rotation. Drop the camera there.
- Click on the Geometric Primitives flyout, and select a shape. You can use any shape for this step, but I prefer the Icosahedron for no reason that makes any sense.
- Drag the selected primitive to a position on the opposite side of the central object from where you placed the camera. The actual distances are not critical at this point, you can always adjust them later.
- Select the camera and then shift-select the primitive.
- Arrange/Align Objects, and align the the camera and the primitive along two axes. In this example, the x and z axes are good choices. Press Apply.
- Leave the camera and primitive selected, and choose Arrange/Point At. The camera will now be aimed at the primitive.
- Still leaving the camera and primitive selected, Group them. Name the group Dolly (or Shania or Reba, according to your tastes).
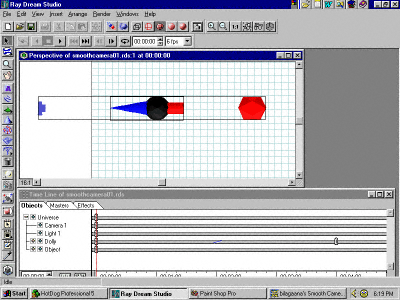
The screen should now look something like Illustration 1 (below).

- Open the Dolly group and select the Icosahedron. Then, Windows/Properties/General tab, and select the Cloak radio button. Close the Dolly group.
- Drag the hot point of the central object to wherever you want the camera to point. This will also be the center of rotation for the Dolly group in the finished animation.
- Select the central object, then shift-select Dolly.
- Arrange/Align Objects, and then select the Align and Hot Point radio buttons for all three axes. Press Apply.
Now, just to make things easier, we are going to create multiple perspective windows to aid in positioning.
- Windows/New Perspective, select the Use Camera radio button and in the dropdown select the camera in the Dolly group (Camera 2, in our example). Press Okay.
- When the second perspective window opens, position and resize the two windows so that both are easily visible. It would be a good idea to save this workspace for future use (Windows/Workspace/Save Current).
- In the original window, select View/Camera/Camera 1 (the original camera, not included in the Dolly group).
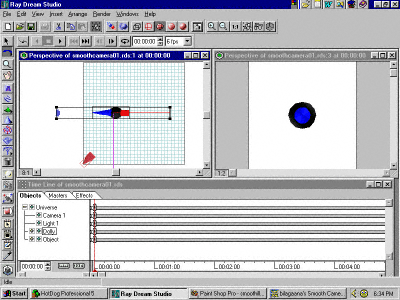
The screen should now look something like Illustration 2 (below).

Next, we use the camera dolly to begin creating our animated sequence.
- Make sure the Current Time Bar is at the beginning of the timeline sequence.
- Select the Dolly group in the Hierarchy/Timeline.
- Select the Camera 1 (original) window, and then change the View depending upon the plane of rotation you intend to employ in your scene--horizontal or vertical, etc. Then, select the One-Axis Rotation Tool. (Here, another and, in many cases, better option would be to use the Properties window/Transform tab/Orientation controls.) Position the Dolly group for the beginning of the animation.
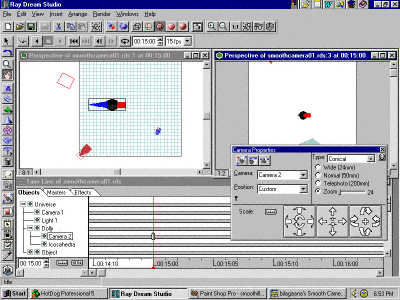
- Select the second perspective window. Then, Windows/Camera Properties, select Camera 2. Set the zoom control to a short focal length (low value) so that the image in the second perspective window encompasses your central object.
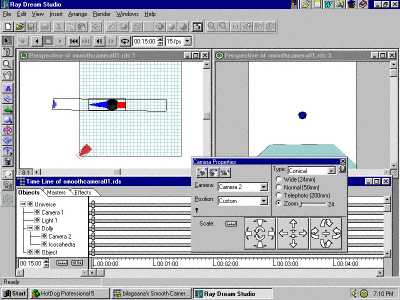
The screen should now look something like Illustration 3 (below).

- Move the timeline forward several seconds, set a key event marker on the Dolly time track, set the zoom control to a higher level. (Double-clicking on the Zoom slider opens a window for direct input of numerical values.)
- Move the timeline forward another several seconds, set another key event marker on the Dolly time track.
- Now activate the Camera 1 perspective window. Using either the Rotation tool or the Orientation controls, rotate the Dolly group around the central object.

- Open the Dolly group, select Camera 2.
- Activate the second perspective window. In Windows/Camera Properties, Camera 2 should be selected in the drop-down. Again zoom out from the central object.
- Click on First Frame in the Time Controller toolbar.

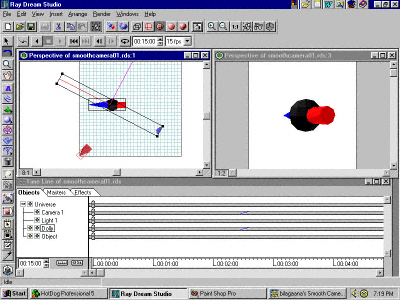
Preview your animation. You can observe the movement of the Dolly group in the left window and a preview of the finished animation in the right window.
If you want to add an interesting elaboration to the sequence and further explore the power and convenience of this technique, at some point in the animation change the axis of rotation of the Dolly group to a different plane. By choosing different viewing positions in the first perspective window and rotating the Dolly group around one axis, it is possible to create some complex camera movement paths.
Keeping the two Perspective windows open lets you easily visualize the position of the camera relative to the object, and watch the effect on the final image.
have fun

All constructive comments, suggestions, and corrections are welcomed.
All contents copyright 1999-2000 bilagaana. All rights reserved. The images may not be copied in any form without the permission of the author. Digitally watermarked.


